Saturday 14 November 2015

Low Carb Baking Mix Collection {FREE DOWNLOAD}

As summer approaches for us and I am surrounded by new life I have been encouraged once again to resume my Trim Healthy Mama journey.

I recently purchased the NEW Trim Healthy Mama Cookbook and have been searching for a low carb baking mix to use in more of my cooking.

I have found some really great recipes on pinterest, Facebook and the internet and needed one place to keep them all.

You can download your FREE pdf HERE


None of the Baking Mix recipe’s contained in this round up are my own invention. Each one has been lovingly put together by the passionate cooks around the web.

I have linked each baking mix recipe to the original source on line. Follow the links for the complete recipes and recipe cards. IF an author does not have a printable for their recipe I have typed it out and included it here.

PLEASE be sure to visit these lovely blogs and encourage the cooks who have freely blessed us with these recipes.

Do you have a favourite Low Carb baking mix? Please leave a link in the comments and I will update and add them to the post and to this download.

Blessings
Chareen

PS There are a couple of recipe’s here that I could not find the original source text for. If you know where they are from please let me know in the comments so that I may give the author credit for his/her work.

Pin this post HERE


FREE Low Carb Baking Mix Recipe Collection Briana Thomas Baking Mix Sheri's Gluten Free Baking Mix Rayes Easy Baking Mix Moma's Low Carb Baking Mix

Baking Mix Recipes on the web

**A couple of things to note ...

  1. Oat Fibre is NOT Oat flour or Oat Bran and those two cannot ever substitute for it. Oat Fibre is bran with all the starch stripped from it and is fat and carb free. Currently very difficult to find locally; only online or through the Aussie Mamas store. The only product you can sub for it is Psyllium (found at any health food or major supermarket).
  2. Integral Collagen/Collagen Peptides are the NON-setting Gelatine. Currently this product is not made in Australia and the only options are the Great Lakes GREEN tin, the THM brand. It has mega health benefits especially for those with arthritis/joint issues.  
  3. Protein Powder is Whey Isolate. Only ISOLATE. Whey Concentrate and blends are not on plan.
  4. Flax meal is also called Linseed in Australia.
  5. Gluccomannan is another difficult product to buy locally. Again, Aussie Mamas have it available, or order online from iHerb or similar, or sub with xanthan gum (will not get the same health benefits) or leave it out.
  6. Almond meal and flour are interchangeable. Almond flour is made with the plain almond nut, the meal is coarser and made with the whole almond (including the skin). Doesn't make any difference to the end product.
**Some items are not available in Australia or other countries.

Low Carb Baking Blends

*Baking Mix (FP) by L.Slote

1 c oat fibre
3 tablespoons coconut flour
2 Tablespoons almond flour
3 table spoons golden flax meal
½ teaspoon glucomannan

 Nutrition for ¼ cup serving: 2.9 grams fat, 1.3 grams carbs
*Found on Facebook

Homemade Baking Mix

2 cups Oat fiber 1 cup
3 TBSP coconut flour
1 cup Collagen Peptides
¾ cup + 2 tsp golden flax seed meal ( if you have whole, grind half that amount of whole and you get the right amount of meal)
6 TBSP + 1 tsp Blanched Almond flour
3 TBSP + ½ tsp Glucomannan powder

**Found on Pinterest

Baking Mix (S)

1 ½ cups Oat Fiber
1 ½ cups Coconut Flour
¾ cup Whey Protein Isolate
½ cup Flax Meal
2 Tablespoons glucomannan

Replace cup for cup with flour.
**Found on Pinterest

*Alternative Baking Mix

1 ½ cups oat fiber
1 ½ cups coconut flour
¾ cup Almond Flour
¾ cup Whey Protein Isolate
½ cup ground Golden Flax
2 Tablespoons Glucomannan
2 Tablespoons Collagen Peptides

Nutrition for ¼ cup serving: 4.1 grams fat, 2.3 grams carbs
*Found on Facebook

*Jen’s FP Baking Mix 


1 ½ cup Oat Fibre
1 ½ cup coconut Flour
¾ Cup Almond Flour
¾ cup Whey Protein Isolate Powder
½ cup Golden Flax Meal
2 Tablespoons Glucomannan

Nutrition for ¼ cup serving: 3 grams fat, 2 grams carbs
*Found on Facebook

*Zoe’s Baking Mix 

2 ⅓ Cups Oat Fibre
200 ml Coconut Glour
⅓ cup Oat Flour
½ cup Ground Golden Flax
½ Cup Almond Flour
½ Cup Whey Protein Isolate
2 Tablespoons Collagen Peptides
2 Tablespoons Glucomannan

Nutrition for ¼ cup serving: 3.3 grams fat, 1.6 grams carbs
*Found on Facebook

Pin this post HERE

Friday 13 November 2015

GrapeVine Studies - Birth of Jesus: Multi-Level - {Review}

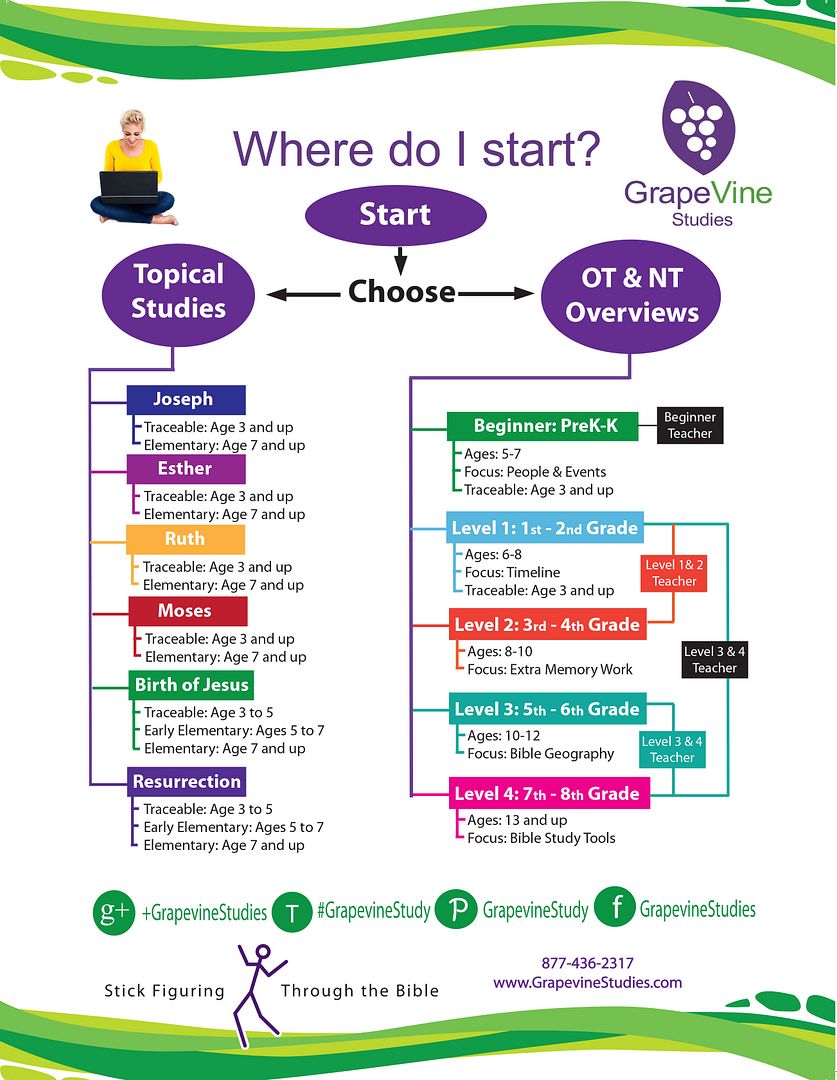
Over the last few years I have seen the name GrapeVine Studies on a few homeschool blogs and have really wanted to use their products with Nathaniel.  I was very excited to learn that they have a Birth of Jesus: Multi-Level and even more excited when they offered it to the crew to use.

One of the things that attracted me to the study is that your student does not need to be writing at any grade level in order to use it.  Not being able to write does not affect their ability to fully use the curriculum.

Currently they have an Old Testament and New Testament overview, Esther,  Biblical Feasts and Holidays, Old Testament Catechism, Birth of Jesus and The Resurrection studies available. You can download a sample of each study HERE.

What we received
  • Birth of Jesus study Student eBook (1.1 MB) - 49 pages consisting of:
    • Birth of Jesus Timeline,
    • The Announcement,
    • Birth of Jesus,
    • The Proclamation,
    • The Wise Men and Herod,
    • Final Review,
    • Map
  • Birth of Jesus Study Traceable eBook (4.9 MB) - 49 pages consisting of the same as the Student eBook.
  • Birth of Jesus Study Teachers Manual (5.24 MB) - 65 pages. This book is divided into:
    • About GrapeVine
    • Teacher Goals
    • Student Goals
    • Supply List
    • Teaching mulit-levels
    • Timeline Narrative
    • Lesson Goals/Key Points
    • The Announcement
    • Birth of Jesus
    • Proclamation
    • Wise Men & Herod
    • Final Review
    • Map

How we used the Study

After downloading the three pdf documents I printed both the teachers and student manual for our use.  I only have a black ink printer so our cover is in grey-scale.  The actual product has a beautiful red and green cover. In the multi-level pack you have two options to use for your students.  The one is the basic student pages and the other is in traceable format which is suitable for younger students or students in need of support in their drawing. The only supplies needed for the student are: a bible, the student pages and coloured pencils.   The student needs the following eight colours to use: Purple, Blue, Green, Yellow, Orange, Red, Brown and Black.


There is not a lot of prep work involved in using the program. The Teachers Manual is well laid out and all the prep work and lessons are laid out in detail.  The basic frame work is laid out for you and it is up to you on how you present the lessons and to what depth you want to pursue each topic according to your own denominational doctrinal belief.


As a teacher you will need The Teachers manual, 8 coloured markers and a bible dictionary.   Since it's only Nathaniel and I, I chose to use sharpie pens and plain white paper as my delivery medium for the lessons. The manual has two different suggested schedules one is daily lessons and the other is weekly.  We did a weekly lesson.
 The program starts with a timeline of events to help the students understand the sequence of events. There is no guess work on how to draw the pictures or what to say to the students it's all laid out for you in the teachers manual. I appreciated having the stick figure guidelines.  This made for a much simplified lesson.  When I first told Nathaniel we would be drawing pictures he complained because he does not like to colour in.  When he saw that we were drawing stick figures he became very enthusiastic of the program.
Teachers Manual sample page.
Working on the stick-figure timeline.


The next stage consisted of looking up the bible verse and then drawing what we had read.  Nathaniel really enjoyed adding up the total number of generations between Adam and Jesus.

Drawing stick-figures for our lesson.
 After completing the last Student Page it was time to do a drawing review.  This consists of the student drawing their favourite part of the story and writing their memory verse.

This is followed with a final review of the study.  The final review consists of 28 questions covering the events from the announcing the generations between Adam and Jesus up to and including when Mary, Joseph and Jesus return and the Word says He grew.


Each sections we studied also had questions covering the lesson. Some lessons had a set of words to look up in a bible dictionary.  There is also a map to label at the end of the book.

*Cost of GrapeVine Birth of Jesus
  • Student Book $8-00
  • Teacher Book $12-50
  • Traceable Book $8-00
  • Student Family eBook $6-50
  •  Teacher eBook $10-00
  • Traceable Family eBook $8-00
*All prices are current at time of review.  Please check the website for up to date pricing before purchasing. All prices shown are in U.S. dollars.
Recommended Age Range
  • Ages 7+

Connect with GrapeVine on Social Media


Facebook Google+ Pinterest Twitter

Over All I thought ...
Nathaniel and I both enjoyed this lesson and look forward to using other GrapeVine products in the future.  He loved the simplicity and that there were no complex drawings and I enjoyed using the Word and coaching him on note taking using stick figures.

The Schoolhouse Review Crew have also reviewed Creation to Jacob.

Blessings
Chareen


Click to read Crew Reviews

Thursday 12 November 2015

Giraffe Faces {Virtual Fridge}

This Week
Wow time flies so fast and we've missed a few weeks of the Virtual Fridge but I'm pleased to say we are back.  This week we learned to use a new medium: acrylic paint.  Painting small area's was a little challenge for Nathaniel as we have not done very much painting up until now.


This Month's Theme
Welcome to the Virtual Fridge for the month of November. If you are after some inspiration our theme is THANKSGIVING.

This weeks Feature

This weeks feature is a tutorial by Susie from over at Busy Toddler: Fall Leaf Craft.

Your Turn

I invite you to take some photo's of your children's artistic pursuits put them in a post and link up with me I would love to come over and see the wonderful art your children have enjoyed doing.
Virtual Fridge Link Up

Blessings
Chareen

Connect with me
 Facebook Google+ Pinterest Instagram YouTube RSS Feed

The Virtual Fridge a weekly art meme where we can hang our children's art on a virtual fridge. This meme was started by Jennifer over at A Glimpse of our Life who kindly invited three other bloggers to co-host this weekly meme.

Your hosts are


Monday 9 November 2015

Eat Your Science Homework {Ann McCallum Books Review}

Something good to eat is always a good way to help children solidify their learning.

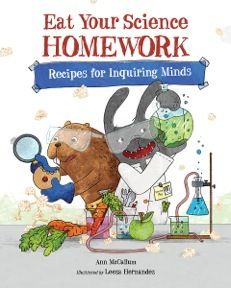
Recently the Schoolhouse Review Crew were introduced to Ann McCallum Books.  Ann is the author of a nifty set of books in the Eat your ... series and Nathaniel and I have been working our way through Eat Your Science Homework.

There are currently three books in the Eat Your Homework series
  1. Eat Your US History Homework  
  2. Eat Your Science Homework
  3. Eat Your Math Homework.
 Ann also has a blog where she shares recipes and encouragement on how to Eat your way through a variety of topics.

What we received
  • ISBN: 978-1-57091-299-3
  • Published by: Charlesbridge
  • Format: Paperback
  • Copyright Date: 2009, 2014
  • Specifications: Teacher: 48 pages
  • By: Ann McCallum
  • Illustrated by: Leeza Hernandez
  • Awarded: Junior Library Guild Selection 
The book is divided up into:
  • Introduction - Here you will discover all about delicious chemistry in the kitchen.
  • Safety instructions - We learned about safety in our lab. The tricks of the trade list was helpful for Nathaniel. It was good to read these.  I realized that some things I had not actively told him before and had assumed he knew.
  • Six experiments - Each experiment covers a particular topic. We love the creative names for each one: Atomic Popcorn Balls,  Density Dressing and Veggie Sticks, Invisable Ink Snack Pockets, Loop, Whorl and Arch Cookies, Sedimentary Pizza Lasagna and Black Hole Swallow-Ups
    • The topic is introduced and explained carefully.  The jargon is introduced in context and fully explained.
    • Next the recipe is presented.  There is a before you begin section which covers time, oven temperature and difficulty. An ingredients list followed by the step by step method.  The author coaches the student carefully in what to do in each step. 
    • The next page is a conclusion to the topic page.  We enjoyed reading these as they give some relevant information, interesting historical note in relation to the topic and concluding words.
  • Review - This is a summary of what you have learned as you've worked your way through the book.
  • Glossary - A concise list of scientific terms used throughout the book with clear explanations of each word.
  • Index -
How we used it


After reading the introduction page on Density, Dressing and Veggie Sticks chapter it was time to gather our supplies.


This lesson involved no heat so I left Nathaniel up to following the directions in the method.  He enjoyed watching what happened as he added each ingredient to the bottle and surmising what he thought might happen when he added the ingredients.


 We learned some new technical jargon: immiscible, miscible and density. We also did some follow up experiments to solidify the topic of density.  The results were edible and Daddy now has some new blue salad dressing to enjoy!


You can download a fabulous Teachers Guide for Eat Your Science HOMEWORK.


Recommended Age Range
  • 7-10 years old

Over All I thought ...
We've enjoyed working our way through this beautiful book. Every single double page spread is beautifully illustrated and contains thoughtful information.  I appreciated how the author spoke directly to the child and did not assume that the student knew something.  Every concept was clearly explained and scientific terms were presented clearly and concisely.  Each experiment was followed up with a Science Sampler which ranged from finding elements present in our home to interesting information on famous scientists over the ages.

This is a fun book to add to your science routine at home and the best part is you can EAT your experiments!

Blessings
Chareen


Click to read Crew Reviews

Wednesday 4 November 2015

Apple Rose Shortcake Muffins {THM E}


A few months ago all these beautiful images of Apple Roses were filling my news feed on Facebook and all I wanted was to eat one.  This year I've been pursuing healthy eating using the Trim Healthy Mama plan and non of the recipe's out there were going to allow me to enjoy an Apple Rose bake. I've finally found my solution! Enter the Apple Rose Shortcake Muffin!

Shortcake Muffin Mix

Ingredients

    • 1/2 cup of sweetener
    • 1 teaspoon cinnamon
    • 2  1/2 cups old fashioned oats 
    • 1  1/2 teaspoon baking powder
    • 1 cup 0% Greek Yogurt
    • 1/2 cup egg white
    • 1/2 cup sweetener blend
    • 1 teaspoon Vanilla Essence 

    Method

    • Mix sweetener and cinnamon in a small bowl.
    • Take 1/4 teaspoon of cinnamon sugar and sprinkle in the bottom of the silicon muffin trays.  Enough to make 12 medium muffins.
    • Grind the oats and baking powder and set aside
    • Blend remaining ingredients in a blender.  
    • Combine wet and dry ingredients and mix well. 
    • Pour 1/4 cup of the mix into prepared muffin molds.

    Apple Rose inserted into muffin mix ready to bake.

    Apple Roses

    Ingredients

    • 6 small apples
    • 6 table spoons of water

    Method

    • Wash and core the apples.
    • Cut them in half 
    • Slice each half into 2 mm ( 564in) half moon slices.
    • Fill a glass bowl with warm water and a dash of lemon.
    • Separate and lay the apple slices in the water.
    • Cover and microwave for 3 min.  
    • Set aside until cooked.  (You can steam them too) The apples need to be soft enough to roll without breaking but not mash! Once cooked remove and drain them.
    • Once your apple slices are cool enough to handle it's time to make the rose.  Take the halves and create a straight line about 30 cm (12 in) long.  Lay the straight edges along the bottom.  The apples need to overlap by half.


    • Lightly sprinkle the apples with the remaining cinnamon sweetener. This is the only tricky bit because the apples are not being held in place by pastry. Start on the left and roll them up to form a rose.
    • Place them gently into the muffin tin and push them slightly into the Short Cake Muffin mix.
    • Repeat until all apples are cooked and muffins prepared.
    • Bake for 20 min  at 180 'C (350 'F)
    • Remove and allow the muffins to rest in the mold for 5 min.
    • Gently remove and cool on a cooling rack.

    Serving Suggestion 

    • 1 Tablespoon of sweetener blend.  
    • Grind in a coffee grinder until you get a fine icing sugar consistency is reached. 
    • Sprinkle over cooled muffins and enjoy!


    These were a most delightful way to end our E dinner last night!

    Blessings
    Chareen

    You can pin this post here:


    *The recipes above are tweaked versions of original recipe's which are not THM but can be found here:
    • Apple Roses Cooking with Manuela
    •  Strawberry Shortcake Muffins to make this recipe THM friendly I substitute the 2 eggs with 1/2 cup of egg white. If you use whole eggs then it becomes a cross-over.  PS the Strawberry version is divine!

    Tuesday 3 November 2015

    The Brinkman Adventures: Season 3 {Review}

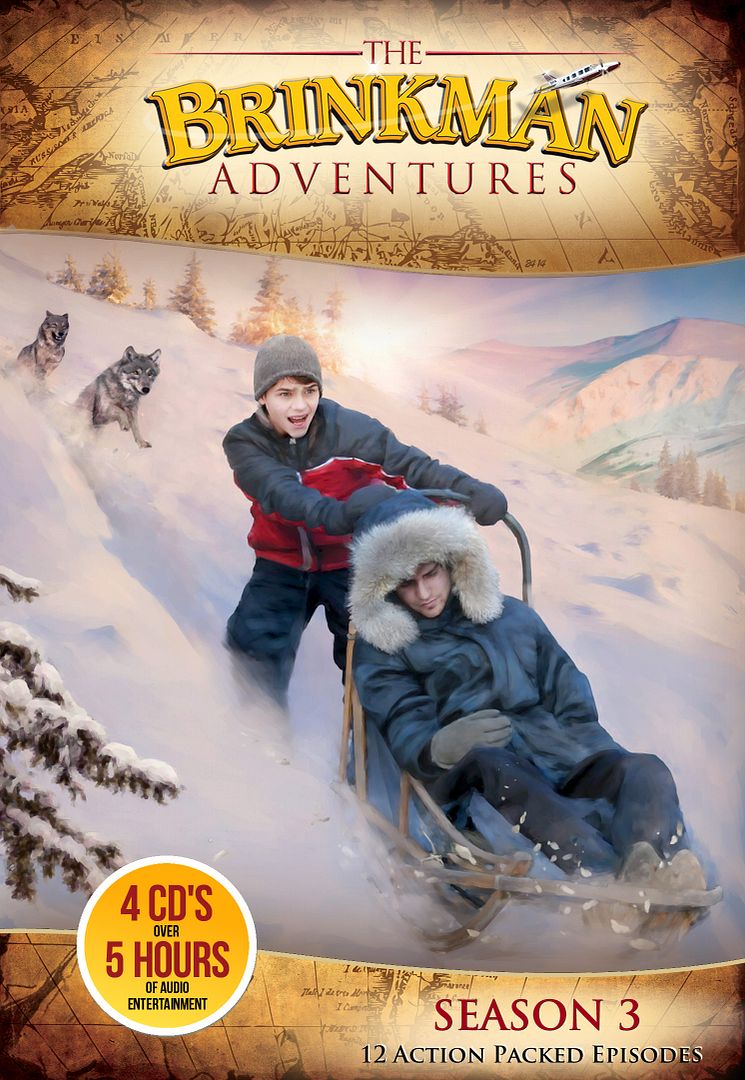
    There's been much excitement around here lately.  Last year we were introduced to the Brinkman Adventures and after listening to season two we have been stalking their website and Facebook page in anticipation of Season 3

    The Brinkman Adventures are the result of a vision and idea the Lord gave to Ian Bultman when he was away on a prayer retreat.

    The vision was to create radio quality dramatizations retelling actual modern day missionary stories using the day to day lives of his own family (there are 10 children in his family).   Each of the children's names have been changed in the production but they all play themselves.

    The aim of the series is one of changing lives and encouraging young people to become missionaries.

    What we received
    • Episodes 25 to 36
    • MP3 Album
    • 24 files in a 599 MB zipped folder

    How we used it
    After downloading our MP3 file I extracted it and imported it into iTunes. We loaded it onto our iPod and enjoyed listening to the episodes on our family room sound system.
    As before we were hooked and could not stop listening to the episodes!

    Each episode has a follow up link on the website with more background information on the missionary story featured along with links to organizations and pictures of the actual people and events represented in the episode.

    There are 12 episodes** in Season 3 and you can read more about the back-stories in the links below: 

    **Episodes 1-12 are in Season 1 and episodes 13 - 24 are in Season 2.

    We have enjoyed each and every episode in this season. One of the highlights for us happened in episode 31 and 32.  Earlier this year we read the biography of Nate Saint and in these two episodes we hear what happened to his son Steve Saint.  It was one of the most moving stories I have ever heard so much so that I cried...Steve Saint performed himself in each episode too.

    One of the most encouraging aspects of listening to The Brinkman Adventures is hearing a family work through real every day life with the Lord. The way they pray together about everyday issues, read the Word of the Lord together, learn grow and play together have greatly encouraged and impacted our families way of living and walking with Jesus.  

     Cost of the Brinkman Adventures
    Suggested donation purchase price
    • Set of 4 CD's $27.99
    • MP3 Album $17.99
    The Brinkman Adventures operates on a donation basis. You have the option of choosing your donation value.  ALL proceeds raised go towards funding new episodes and supporting missionaries around the world.

    There are two sample episodes available for you to listen to online. Episode #1 is available to listen to at the bottom of the Fun Stuff page and episode #9  The Provider has it's own dedicated page.

    You can watch behind the scenes recordings of the family recording the episodes on YouTube.

    *All prices are quoted in US $ and are current at time of review. Please consult the Brinkman Adventures website for current prices

     Recommended Age Range
    The stories are intended for family listening.

    Over All I thought ...

    If you are looking for the ultimate family Christmas gift look no further! The Brinkman Adventures is full of true to life drama, encouragement and inspiration for you and your family. Each episode has inspired us to find out more about the missions that are happening around the globe today.

    Blessings
    Chareen


    Click to read Crew Reviews

    Wednesday 28 October 2015

    Overcoming the fear of homeschooling in the Highschool Years

    I've been pondering the High School years quite a bit of late.  It feels like the other day I was embarking on these years with my first two and all of a sudden I have two homeschool graduates, one of them is in Great Britain and the other is doing a trainee ship. Looking back I'm surprised at just how quickly those years passed by.

    I'm often surprised at  the FEAR of the high school years that is expressed among home educating families and concerned members of the public.  Today I would like to share some thoughts on 5 Hurdles to Overcome in teaching the High School Years.

    5 Hurdles to Overcome

    1 - Negative Mindset

    • Your attitude sets the tone for your student towards any given subject matter.  Be careful of passing on a negative mindset to your children which is born out of your own experience with a certain subject matter. 
    • It's your job to facilitate learning. If the subject matter at hand is outside of our own personal expertise, it is our job to help find someone who can help our student better understand the subject matter at hand.
    • A great answer for any question you can not answer is to say: "That's a good question, I don't know the answer let's find out together." The high school years are an excellent time to model how to keep learning.  The point is go on a journey of discovery together.  You may be surprised to learn that you actually enjoy (dare I say it out loud ?) Algebra or Chemistry or Quantum physics ...

    2 - FEAR

    • For each and every one of us there is a subject out there that makes us quake in our shoes and rightly so. There are not very many people who are able to be perfect in every subject matter.
    • The balance is remembering that FEAR is False Evidence Appearing Real.
    • Confronting this fear with a fellow homeschool parent and finding the truth is better than passing on your own fears to your children.  
    • It is impossible to teach/know everything there is to know about any particular subject matter due to the information age we live in.You do not need to FEAR that you may miss something.
    • This is where co-ops and support groups come into play. Do not be afraid to ask for help ...

    3 - Please Help ?

    • It saddens me that many homeschool families quit because they think to say HELP we are stuck in this or that subject area is somehow a confession of failure. 
    • Remember: To say I don't know how to do something takes courage. We encourage our young children to ask for help and yet as adults we don't ask for help.  This is foolish and serves no good purpose.
    • No two families are the same and each one has it's own set of needs to be met.  What works for one family may not necessarily work for yours.
    • The secret is to keep asking until you find the key that unlocks the mystery of a particular subject for your family. While this can be time consuming it is worth the effort it takes.

     4 - Google

    • Home education and the internet have met up with each other to form a rather profitable marriage.  While this is good for home educational businesses it's really bad for the home educator who has no hands on experience and does not know what works for which particular situation. 
    • On one hand this is great as we have an unlimited supply of advice at our finger tips, the counter balance is we don't have anyone who knows us and our children who can support us.
    • I would encourage you to find real people to sit and have cups of tea with. Go from home to home within the group and see first hand how systems work then you will be better equipped to make decisions on what will or will not work for your family.  
    • Only tackle Google and ask once you are armed with specific questions that need to be answered.
    • Do NOT let Google dictate what you should or should not be doing. 

      5- Pinterest.

      • For some of us Pinterest can be a source of anxiety and discontent and for others it's a paradise found
      • There are some amazing free resources and ideas to be found here.  The problem is that the ideas are limitless and can end up paralyzing you to action.
      • If you choose to look for answers here don't get too hung up on the perfection displayed by others.  Remember it's a cyber world where we can portray anything we want to, in any way we want to.  Nothing is as perfect as it seems.  Many online companies / homeschoolers purchase picture perfect scenes to 'sell' their information on Pinterest.
      • Use with caution and enjoy.

      "Can I teach 

      high school science?

       NO

      As your student gets older, 

      your role changes from 

      teacher to fellow learner."
      Things to consider

      • Research your options while your students are in the primary school years so that you have a clear pathway before you.  
      • Be clear on your expectations.
      • Have an understanding of the level of education required to tackle different areas in the high school years.
      • Research and save for more expensive items such as a microscope.  Do you have to have a microscope ?  No but it is a great hands on learning tool that makes the sciences come alive in your home.
      • Find out where to purchase the items you need to do practical labs.
      • Consider the scope and sequence before changing curriculum or you might end up repeating what you have already done.
      • Get to know your student and what their long term study goals are and work towards those. Make it a priority to achieve what they need to accomplish their tertiary goals in the science arena.  
      I would like to encourage you not to fear but embrace the high school years.  See it as an opportunity to learn and discover more thoroughly what you have always wanted to know.

      Secondly remember you can not teach it all.  There is no A-Z list for you to tick off and say right now I have taught this and that  and we are finished.  These days information in any subject area is exploding with at an exponential rate and it would be physically impossible for you to teach all there is to know in any given subject matter due to this..


      I would love to read your thoughts on Learning in high school please leave a link to your post in the comments.

      Blessings
      Chareen
      You can read more on these five hurdles in my post: HELP! How am I going to teach ... ? 

      Read more on overcoming the hurdles to home educating in the high school years:


      Home School High School Topics

      Over the next few months we will be sharing some insights into the following aspects of home educating through the high school years
      • Planning for High School {How and When,ways to/how we're planning to earn college credit while still in high school, Meeting High School Requirements, how to assign credit when there aren't tests, What records do you keep? How do you present them? What influences your method, your emphasis in certain areas?}
      • Electives in the High School Years {Following Passions, following interests, fitting a job in with school, and Being intentional in Preparing for what comes after high school, Life skills.}
      • Math, Science, Biology, History {What do you use ? Why do you use ... ? What influences your choices/selection? }
      • 30 September - Language Arts {Poetry, Literature, Composition, writing, What influenced your choices/selection?}
      • "How am I going to teach High School ...?" {Addressing the fear factor of teaching subjects we struggle with or know nothing about, How to achieve credit in subjects your student *hates*}
      • 25 November - How do you fit it all in ? {homeschooling high school alongside homeschooling the others, Fostering Independence, Do you generalise or specialise? Schedules,}
      • 30 December - Graduation { Fostering Independence, How do you know when they are done ?}
      Until next month.  Happy blog hopping
      Blessings
      Chareen