Showing posts with label TOS 2013. Show all posts

Saturday 20 April 2013

A Quest with Math Rider {Review}

There is always a lot of talk about math fact learning in the home school sphere. I know all the pro's and con's and can even give a talk on the many methods of teaching math facts. The thing I find the hardest is applying what I know I need to do. When I saw Math Rider my first thought was I need to do this with Sir N.  He loves an adventure and in order to conquer this one he needs to learn his math facts well.

What we did
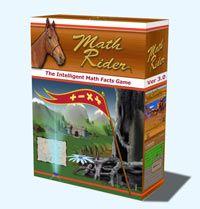
My desktop PC is running Windows 8. I asked my teen son to please install the program for me. It was a simple straight forward process and took him less than five minutes to accomplish. A short cut icon appeared on the desk top and with a double click the program started.

The 'home' screen has the following options: Log in, Add New Rider, Modify, Cancel, Delete and Help.  The Help menu opens an in game Help web page with YouTube clips to help you.
Setting up Sir N's account took less than a minute and he was playing.  A pop up widow asked us for a name, password, password confirmation, password hing, gender and language.

In the beginning Sir N struggled because he did not know the numerical keyboard worked or the layout of the numbers and it took him a while to figure out how to input the answers.  He was a little distracted by the background music in the beginning that was easily solved by muting it. After two rides he asked me to put the music back on as he liked it.  It took one game for him to get the hang of what he had to do. You need to input the answers to make the horse jump over the hurdles.  Each hurdle has a math fact sum beneath it. When he missed the answer the game auto paused and a child's voice read out the math equation and answer to him and then the horse would continue running bringing up the next jump. As he became more proficient on the ride the hurdles started appearing closer together and the horse galloped faster.  On any facts he struggled with it gave him a longer approach run and the horse slowed down too.

We have the sound on so that the story is read to Sir N.  The story teller reads clearly and slowly.  This is what the screen looks like when you log in on your user name.

  1. Click on the rider face to take you back to the log in screen where you can create or select a different rider
  2. See the stats of your student at a glance (Rides, completed quests, Addition, subtraction %)
  3. Click on the medal to see where you rank against other riders or yourself. This page allows you to select the math level to view (Easy, Medium, Advanced). You can see your rank, date completed, how many rides it took, pole jumped, mastery level by percentage and the total time it took. You can also view the rewards you've earned.
  4. Click on the speaker to set the music and effects volume
  5. My Statistics shows you your top challenges, overall mastery level, improvement since you started graph and a grid box which uses colour to show your statistics for each math fact.
  6. Practice run gives you the ability to set the operation you want to work on (addition, subtraction, multiplication, division), race mode (obstacle course, time challenge), number of questions and fixed number to practice. Playing in this mode is not counted towards any of your statistics.
  7.  New Quest allows you cancel a current quest and start on a new one. If you start a new one it allows you to set the level (Easy, Medium, Advanced) and operation (addition, subtraction, multiplication, division) to work on.
  8. Retell the quest story you are on.
  9. View a map of the quest you are on. This map updates at the end of each ride so you can see just how far you have ridden in the math lands.
  10. Continue with your current quest from here. 
We love how each member or place in Mathlands has a mathematical name for example the elven city is called Euclid and the Doctor is called Dr Hypotenuse.

What Sir N thought
  • I love that I can ride a horse
  • It was hard to put the numbers in, in the beginning.
  • I like to see how far I have ridden my horse Shadow along the road on the map.
Cost
What you get
  • The game is a full download with lifetime updates. 
  • Can be used on Windows and Mac (System Requirements)
  • Does NOT need Internet connection to play.
  • Allows up to eight players.
  • ALL the math facts are enabled from the beginning. You are able to choose what your child to work on from day one.
  • After as little as one ride you can see where your child is at.
  • In game help
  • All four math operations are practiced (addition, subtraction, multiplication and division) You choose which one to work on and what level of competency you want to start with easy or hard.  You have the ability to limit it to one mathematical operation or a mixture.
  • The game is intelligent and learns what your child's ability is and then self adjusts to suit their particular learning curve. If they are struggling with a particular fact it will automatically add that fact into the game more often until mastery is achieved.
On the WWW

Social Media

Over all we are both very happy with using MathRider.  I have a user name too and Sir N is looking forward to racing me one day.  Some days when he is struggling I open up my rider and he shouts the answers and I input the numbers.  We mix it up take turns and have fun together.

What is your favourite resource for teaching Math Facts ?

Blessings
Chareen


Photobucket

 photo DisclaimerGraphic1_zpsf612f371.gif

Saturday 30 March 2013

Astronomy and Space Unit Study {Review}

With our chronological approach to history this year we started with Creation and from here we progressed to space and the planets. Sir N is enjoying exploring the outer reaches of the universe.  We were delighted when A Journey Through Learning offered us the opportunity to use their Astronomy and Space Unit Study as our spine to guide us through our learning.

We downloaded the Unit Study There are sample pages for you to look at). The pack contained everything we needed. If we did not have a library or books close by we could have studied this topic independently with the information provided.  If you do a page a day the Unit should take approximately one month to complete.

We are digging deeper into each topic and it's taking us longer but we are enjoying the read aloud pages which have launched us into digging much deeper into each area. We are watching plenty of YouTube clips, reading books from the local library and filling in the Notebook Pages provided. Sir N's understanding is growing as we look up the new vocabulary introduced with each lesson.These words are underlined and introduced in context.


After downloading the unit I started printing off the notebook pages. The notebook pages are directly after each subject information is read. On one hand this part of the unit is good as you know which pages are to be filled in after reading the information pages. On the other hand if you want to only print the notebook pages it becomes a tedious effort as you can't just print pages 1-25. You need to print two pages then find the next note page and look for the number then print the next one. If I could change one part of the unit it would be this. For ease of Notebook page printing I would place all the notebook pages together as an appendix and have a line saying: Notebook pages X-Y at the point of the page so that I would know now it's time to fill in that particular notebook page.
I copied the PDF document to my Galaxy Tab and we would read the notes here together. I discovered that when looking for answers for the notebook pages we could underline the answers and enlarge the print on here for Sir N to use in filling in his notes.
I have a three ring binder in which the notes are added. I use a three ring binder as I find that two ring binders the pages tear out of easily.
We have also borrowed a stack of books from the library to read and supplement our reading from here and have made use of LEGO to be creative. We are just about to start exploring each of the planets in the study.
We have enjoyed our Journey Through Learning about Astronomy and Space and look forward to exploring The Earth Lapbook in the future.

Contents
  • 70 page Unit.
  • Information page (to read to the child)
  • Correlating activity pages (These are provided straight after the information read. Some of these were practical hands on activities others were notebook style pages to fill in or draw on.)
  • Vocabulary builder pages. As you read through the text you will notice words which are underlined. Once your child has heard the word in context it is time to look up the definition in your dictionary and fill in the vocabulary note page.
  • The Unit Study came with a comprehensive how to page with ideas for study choices.
  • Tips to go the extra mile
  • A comprehensive Table of Contents
  • Plenty of colour graphics. (photographs and clip art)
  • A good balance of writing and drawing on each notebook page.
  • Bibliography
  • Five Enrichment Pages
    Books I have Read
    Planet Book Report
    Narration form Young Children
    Narration from Older Children
    Organization Page
  • Suggested Additional Reading Material
  • A full index of other Products available from A Journey Through Learning.

Cost**
  • Instant Download $13.00
  • CD $14.00
  • Printed Version $21.00
** All prices quoted are correct at time of posting. It is the responsibility of the purchaser to check the cost before purchasing. Prices are subject to change without notice. All prices are in US $.

 Extra's
On The WWW
As you can see they have a fairly comprehensive range which is constantly growing. Pop on over to explore what they have to offer.

What unit studies have you done lately ?
Blessings
Chareen

Photobucket

Thursday 21 March 2013

Join us for a day homeschooling {A Photo Diary}

Sometimes our days are slow (not very often may I add) and sometimes busy (more often than not!) but never is it twice the same. Today I would like to invite you to join us for a photo journey of a home school day at Every Bed of Roses. I do confess I am a shutter bug and love taking photo's and experimenting with the D-SLR I was given last year. In order to lower the number of images in this post I've created a few collages of our day.

This year we are continuing with using our environment to encourage learning. A home school family on the other side of Melbourne invited home school families to come over and join them for a day of  Science for Home Educators: "A Shocking Experience"


Our day of Science Adventure


First things first.  I needed to find some clean clothes in Mount Ironmore to iron for the day (How do you super Mom's do it ? I always seem to have a Mount Washmore or Ironmore!). Followed by breakfast and picnic preparations. We are loving having a cooler on wheels it goes everywhere with us these days.


Next it was time for my shower while Sir N practiced math facts on Math Rider and did lesson 19 with Children's Music Journey.  Before we left we had some quality time with Pugsley.


My friend collected us and we drove 70 km to the other side of greater Melbourne. We saw the Southern Star which is nearing completion.  We hope to go for a ride on this one day. Admired the architecture and listened to The Song of the Unicorn. Once we arrived in the suburb of our desired destination we looked for a park to enjoy a picnic lunch together.


Soon enough it was time to tackle the lab and learn about molecules, positive and negative charges.


We used rods of perspex, glass, polythene and something else I can't remember the name of. We rubbed them with a piece of woolen cloth to charge them up and checked to see if we could move water and pick up small pieces of paper.


We also used this little box (Gold Leaf Electroscope) with a gold leaf to see how static electricity moves through air and our own bodies.


Let the static electricity fun begin. We got to play with a Van De Graaff generator.  It was so much fun watching all the children's hair stick up! Sir N was so highly charged after his time on the generator he could pick up the little bits of paper on the bench!


All too soon it was time to leave the lab. We stopped at our park for another cup of tea and then it was time to pack up and drive home. We played with the DSLR in the tunnel, looked at the beautiful skyline of Melbourne and listened to Hallelujah Handle. Once home it was time to play a game or two on Mom's Galaxy Tab and touch base with cousins. Dinner was soon ready and then it was time for bed. Sir N slept very well after 140 km round trip !

My favorite moment 

This is my favourite moment of the day. We stopped for a cup of tea before traveling home and this is what we saw.


I agree with my bloggy friend Susan who encouraged me this week with Don't miss the Little Moments. I encourage you to take out your camera and capture those moments with your children. I have two teens as well and one has moved out. I wish now I had taken more pictures and had more memories. That time passes in a twinkling of an eye. If you need inspiration I invite you next week to take a journey with other home school Mom's ? Have a look at what the Crew have been up to this week: Our Homeschool Day in Pictures. (Coming Next Tuesday 26 March)

Blessings
Chareen  

Photo collages made with: Photoscape a FREE photo editor

Children's Music Journey {Review}

Have you heard of Adventus? Neither had I until recently. I am so excited to share about their products with you today.  One of the things I've been wanting to do since I was in high school is learn to play the piano! MusIQ HomeschoolTM has two excellent products for learning to play the piano: Piano Suite and  Children's Music Journey.  Sir N has been using Children's Music Journey and recently completed lesson 19 after beginning with the program three weeks ago. He begs me everyday to do his piano lesson.  I have not had one negative comment about practicing and his enthusiasm has not diminished.


Using Children's Music Journey Volume 1.
Miss Melody
{Practice Room Supervisor}
  • Each lesson opens with a 30 second piece of music composed by a famous composer who also happens to be their teacher. 
  • The 'Teacher' is a famous Composer who builds a great relationship with the students.  Sir N so enjoyed his first lesson he did a second one straight away! And he talked about it all evening with Paul.
  • The Composer shares insight into his music at the start and during his lesson too.  I like this feature as it compliments our Composer Study.
  • Consistent instant feedback.  This feedback is always positive and moves your student forward even when they make a mistake. At first I felt I needed to sit next to Sir N and coach but I soon realized that if he makes a mistake the 'Teacher' will correct him immediately.
  • Lesson one is learning high and low notes using graphics.  It feels very slow after doing traditional music lessons with my first two. After a few lessons I realized that the sequence and speed is perfect because the nature of learning to read music is in itself challenging.  This method ensured success and because of this Sir N was happy to practice and do lessons. It was slow enough that everything learned was reinforced and he did not have to undo wrong learning.  As soon as he successfully completed a lesson and practice he was able to do the next lesson and build his knowledge base.
  • The lesson ends with three minutes of the opening piece of music.
  • From here Sir N proceeds to meet with Miss Melody for practice.  Miss Melody teaches: theory, aural training, hand position, practice of lesson and music composition.
  • After this Sir N is allowed to play in the games area.  Each game is geared towards reinforcing what has been learned in the current lesson. He loves the rhythm games and has enjoyed playing the aural training games. He loves finding the buried treasure and recently added in catching falling leaves via the keyboard key names. 
  • Sir N's next favorite 'room' is the library where he regularly explores pieces of music by famous composers. 
  • Some days he meanders to the composition room and records his music.

Features
  • Choose your keyboard
  • Set an individual pin to use for each student
  • Three mode settings for the program ( Free, Normal, Strict )
  • Choose your students Avatar (16 options)
  • See at a glance which lessons / practices have been completed.
  • Be taught by a famous composer.
  • Miss Melody supervises practice sessions.
  • Lesson and practice lessons are linked {Miss Melody reinforces what was learned in the lesson.}
  • Introductions to famous classical pieces of music.
  • Over 200 pieces of classical music introduced to your children as they learn to play the piano
  • An improvisation room where the students play and record music.
  • A Games room with ten games
  • A library where you can listen to your own compositions, learn more about a composer, redo a lesson, research, learn to play area, Listening area getting to know the introduced pieces of music. learning library where they practice music reading / playing 
Games
  • Games unlock as the students skill base grows via their lessons
  • Some games are to practice music notation and reading (reading and discriminating)
  • Some games are for aural training (listening and discriminating)
  • Rhythm practice game
  • Note letter game
  • Aural game hear the note play the note
**Cost
This program is quality and excellent value for money and time.

A complete overview of each volume is available at MusIQ HomeSchool 

    • Volume 1 $69.95 (25 lessons) {CD or Download}
    • Volume 2 $69.95 (35 lessons) {CD or Download}
    • Volume 3 $69.95 (35 lessons) {CD or Download}
    • Purchase a 3 volume set $179.85 (save $30) {CD or Download}
    • Monthly Subscription $10.95($131.40 per year)
    • FREE 7 day Trial available

      Homeschool Early Curriculum
        • Year 1 Quick Start Bundle {CMJ 1 + Lesson Plans + 49 MIDI keyboard} $199.95
        • Year 1 {CMJ 1 + Lesson Plans} $89.95
        • Year 2 {CMJ 1 + Lesson Plans} $89.95
        • Year 3 {CMJ 1 + Lesson Plans} $89.95
        • Monthly Subscription $10.95
        • FREE 7 day Trial available 
        • Year 1-3 Bundle {CMJ 1, 2, 3 + Keyboard + Level 1 lesson plans} $309.95 (Save $60)
        • Year 1 Lesson Plan $29.95
        • Year 2 Lesson Plan $29.95
        • Year 3 Lesson Plan $29.95
          ** All prices quoted are correct at time of posting.  It is the responsibility of the purchaser to check the cost before purchasing. Prices are subject to change without notice. All prices are in US $.

          Extra's

          We are having an amazing time learning to play the piano. I wish I had known about this program 10 years ago when my first two were homeschooling. If you are wanting your children to learn to play the piano I highly recommend investing in Children's Music Journey.

          Blessings
          Chareen

          Photobucket

          Friday 15 March 2013

          A Touch Math Adventure {TouchMath Review}

          TouchMath has been designed to use as a stand alone math program or as a supplement to what you are already doing. It's system reinforces maths principles and builds a solid foundation by helping your student firmly understand the concrete concept and transition via a hands on method progressing your student towards abstract maths. Sir N recently started using the Second Grade Homeschool Program.

          Touch Math is designed to help children master math skills as they "see, say, hear and touch"


          "TouchMath is the only program that uses the actual numeral as a manipulative by having TouchPoints (concrete level) and uses visual cues (pictorial/representative level) throughout the program to eventually remove visual cues and TouchPoints so the student can demonstrate a symbolic/abstract comprehension of the skill" - Research
           
          Second Grade Homeschool
          • Four Units.
          • A comprehensive index (topics, module contents, all activities)
          • A full overview of vocabulary and resources
          • Page by page instructions and answer key
          • Content reviews and post test instructions
          • 6 Module instructions.
          • Progress Monitoring records 
          • A full implementation guide which provides a full program overview, tips and all the resources you need. 
          • 90 Student Activity Sheets
          • 6 Assessments
          • Answer Keys
          • Download Samples for each Unit
          About the Worksheets
          • They are designed to take you from concrete to the abstract
          • From simple to complex processes
          • Build mathematical language (technical jargon)
          • Some worksheets are for individual practice and others are teacher guided. Each one is coded for you to see at a glance what your student is doing.
          • The activity sheets are uncluttered and clearly laid out.
          • Each sheet contains a footer bar with a description of the skill / topic covered on the page.
          • Pre and Post test modules to help you assess a students placement and their personal level of competence.
          Record Keeping
          • A record sheet is provided to help provide overview of your students progress
          • Contains the topics for each module
          • Enough space to record multiple student information.
          • Each unit contains a full list of State Common Core standards worked on. This makes it easy to record your units.
          Grade 2 Optional Extra's
          Our Journey
          With great excitement Sir N and I looked at samples of the Grade two year and decided yes we would like to try out some hands on Math learning. Sir N is a hands on learner who loves trying new things and this year I am trying to work more on allowing delight directed learning.

          It was with great anticipation that we downloaded our PDF lessons. I felt a little overwhelmed when I opened Unit A and discovered it contained 239 pages! My curiosity got the better of me and I checked the other three: Unit B had 233 pages, Unit C had 235 pages and Unit D had 231 pages.  Wow I've never had a math program that came with the wealth of information supplied by TouchMath. No there are not  200+ pages per unit for your child to fill in.  Each unit contains 90 Student Activity Sheets the balance of each unit contains instructions for you the parent. It sounds like a lot of work but it is not.

          Each unit contained a full implementation guide containing everything I needed to obtain the maximum benefit of the entire home school program. 

          As we worked through the program I realized that it builds precept upon precept. I was surprised to learn that the program has been around since 1972 and as a result they have a lot of experience in teaching math. Since commencing my home school journey one of the things I have learned is that we push our children past the manipulative's learning stage too quickly much to the determent of their math learning.


          Touch Math is unique in that it uses the physical number as the manipulative. This in turn means that you do not need to purchase any additional resources to teach maths. Having said this we have really enjoyed using the manipulatives supplied with the program. (Flip Cards, Student Number Cards, Second Grade Software, Touch Numerals with Base 10) It was like having Christmas when our math manipulative box arrived. I have not seen Sir N as excited about Math as when this 14 pound box arrived.

          To make using the program easier I downloaded the pdf documents to my Galaxy Tab and had that close at hand to help me with each lesson.


           We spent the first part of Unit A learning the numeral touch points and becoming familiar with the program.  The software was especially helpful in this.

          Each day we used the Flip Cards for math fact drill followed with a 15 minute lesson. There is no set number of lessons to do each day.  The pace of the lessons is set by the child and their individual grasp of the concept. The recommended time spent on a lesson is twice your students age. Sir N is seven which meant our lessons were 15 min a day.

          Each set of flash cards correlates to the unit you are working through.  There are three boxes of flash cards per unit. The quality of the cards is excellent and they are big and easy to read. We did not use all the cards at each lesson we used up to 20 cards at a time depending on the skill level attained or the facts memorized.  We added in new facts as other facts were mastered. The back of each box has suggestions for usage. The spine of the box contains the name of the unit along with a description this makes for easy recognition if storing them standing up or in a box.

          I really enjoyed using the base ten system with Sir N.  It reinforced the number 10 concept with him and helped him grasp borrowing in subtraction.

          I was impressed with how math strategies are taught with each lesson. I also enjoyed the natural introduction of the technical jargon for maths. Each term is simply explained and with appropriate repetition the student becomes familiar with the math concept with ease. 

          Sir N can become distracted with graphics so the clean uncluttered presentation of each page benefited his pace of learning.


          **Cost {TouchMath Second Grade Homeshool}
          • Unit A $ 59.95
          • Unit B $ 59.95
          • Unit C $ 59.95
          • Unit D $ 59.95
          • Purchase all four units for $ 199.95 and save $39-85
          • The manipulatives are optional extra's. I would highly recommend you investing in these as they make for a much richer sensory program. There is a list of suggested resources at the bottom of the Unit purchase page.
          ** All prices quoted are correct at time of posting.  It is the responsibility of the purchaser to check the cost before purchasing. Prices are subject to change without notice. All prices are in US $.

          Social Media
          Touch Math uses social media to bring you their latest offers and free downloads as well as teacher support by providing a platform to ask your questions and have them answered quickly.
          What others are saying Online
          Overall we are enjoying this program. It does not contain busy work. Each page has a purpose and keeps the student engaged and moving forward. The manipulatives add a positive dimension to the daily math experience.

          Blessings
          Chareen

          Photobucket

          This post is part of and linking with the Schoolhouse Review so don't forget to pop on over and read what others are saying about Touch Math.

          This post contains NO affiliate links.

          Disclaimer: I received a free copy of this product through the Schoolhouse Review Crew in exchange for my honest review. I was not required to write a positive review nor was I compensated in any other way. All opinions I have expressed are my own or those of my family. I am disclosing this in accordance with the FTC Regulations.

          Tuesday 12 March 2013

          Day 2 - Schooling in the Kitchen

          The culinary arts are generally an over looked valuable resource in home educating. We are often focused on the academic achievements of our students, in order that they are able to access tertiary education, that we forget to arm them for real life. The future generations are losing the ability to cook wholesome food and our daughters don't know how to prepare healthy home cooked meals or stock a pantry.

          Last year Sir N and I delighted in watching Junior MasterChef. The thing that struck me time and time again was the young ages of the contestants.  The 12 who made the final selection in Season One ranged in age from 9 - 12 years old.  These young people had definitely not learned to cook in the month before starting on the show.  I was impacted by their passion and the knowledge of their skill shone through.  How did these children get here ?

          It starts here
          Real life kitchen learning starts in the preschool years when we buy all those cute play sets and allow them to play in the sand pit and bath. Repetitive play at this stage reinforces and refines the fine motor skills needed to work safely in a kitchen.

           Once they have attained a certain level of prowess progress to the kitchen with child safe instruments and allow them to cut soft foods (banana, avocado, bread, etc) and help make lunch. Most importantly get them helping you to clean up the kitchen after they have finished.

          As they grow taller and depending on the height of your benches expand your children's repertoire in the kitchen to helping cook dinner.  Remember to take them from being spectators to participators and onto creators in your kitchen. 

          Life Lessons in your Kitchen
          Sarah over at My Joy Filled Life gives a comprehensive breakdown of subjects your children can learn in your kitchen.  The ideas are endless and only limited to your imagination. The most important thing to remember is to keep it fun and enjoy the process.
          • Reading - Recipe's, Ingredient lists on products,
          • Language Arts - Learn about the abbreviations used in cooking and science
          • Math skills - Budgeting, Measuring, Multiplying,
          • Science - Chemical Reactions, Density, 
          • Home Economics - Meal planning, Storage, Cleaning, Storing food appropriately
          • Biology - Parts of an animal in cutting meat, 
          • Safety - Using equipment Safely, 
          • Geography - Find recipes of traditional foods of the country you are studying
          • History - Find out how food was prepared and what was eaten in the era you are studying and try it out.
          • Gardening - Grow your own herbs on the windowsill.
          • Art - decorate biscuits, make a ginger bread house, etc
          • Gift Giving - cooking a meal for a friend in need, baking biscuits for the elderly, etc

          On the www
          Since it's close to Easter we decided to bake an Easter Egg Rainbow Sponge Cake.  Sir N loved seeing what would happen with the colours and all the taste testing. . .

          Tutorial

          Beverley Paine
          "Children love learning until we kill that love by insisting on teaching when they are already busy learning. Be mindful of what our children are learning when we get that urge to teach - let's learn how they learn optimally and tune into that and help them learn what we want them to learn as well as what they naturally go about learning themselves" - Beverley Paine


          How do you apply Delight Directed learning in your Kitchen ?

          Blessings
          Chareen

          This post is part of a week of blog hopping hosted by The Schoolhouse Review Crew: 5 Days of Teaching Creatively Day TWO

          5 Days of Teaching Creatively
          Day 2
          1. Delight Directed Instruction
          2. Schooling in the Kitchen
          3. Toy's, Games & Puzzles
          4. Homeschooling in a Crisis
          5. Hands on Projects

          Don't forget to enter the Teaching Creatively Giveaway.  Pop on over to Ben and Me to enter in order to win one of three prize packs. (1st prize $525 value, 2nd prize $225 value and 3rd prize $190 value)


          **Images from Free Digital Photo's: Child playing with Kitchen Utensil - Stuart Miles, Senior Chef Teaches Young Chef To Cut - Marin


          Here are some more posts by homeschool moms with ideas about Schooling in the kitchen


          Monday 11 March 2013

          Day 1 - Delight Directed Instruction

          I have spent a delightful few weeks exploring the wide scope and vision of delight directed education.  I do confess that in times past I have shied away from the idea as I had connected delight directed learning with doing absolutely nothing and allowing the child to explore and teach themselves.  I have since come to realize that this is a far cry from the reality of allowing your student to explore the world around them with you facilitating and enriching the experience.

          I have been homeschooling for over 15 years and to be honest I have been experiencing a deep dissatisfaction with our journey over the last few months which in turn has found me in an almost paralyzed state as a home school mom wondering what on earth to do.  I have come to realize that I have fallen prey to  the slavery of checking every box on my home school instructors guide in order to have a tangible indication that Sir N has learned something.   Even Sir N has been bitterly complaining that he hates school.  Each time I say it's time to do school he pitches a tantrum. . . Enough! It's time for change and I think that we will be incorporating more Delight Directed studying around here.

          What is it ?
          • Delight - a high degree of gratification, joy, extreme satisfaction, something that gives pleasure. Delight is a more permanent pleasure than joy, and not dependent on sudden excitement.
          • Directed - means Aimed; pointed; guided; regulated; governed; ordered; instructed
          • Education - Education comprehends all that series of instruction and discipline which is intended to enlighten the understanding, correct the temper, and form the manners and habits of youth, and fit them for usefulness in their future stations 

          Delight Directed teaching / study is not about a home school method or formula it's about feeding the heart and mind of your student. It's about lighting a spark and flaming it in the mind and heart of your student towards what ever it is that you are learning about together.

          I am inspired by what Greg Harris has written on delight directed education:  "A delight-directed study is like a wonderful fire in the mind of a student. It starts small, but as it grows, it begins to consume vast amounts of information until it bursts into a roaring blaze of insight, understanding and creativity. It takes on a life of its own." - Greg Harris

          We need to remember that as parents we are the ones with life experience and still need to direct (point/guide) our students learning and this in turn means opening up new avenues for students to explore and enjoy.

          How does this work ?
          I have learned that it's about listening to your child's heart, it's all about connecting and expanding upon the platform that you are currently laying in what ever field you are exploring.  It's about answering the burning question upon your child's heart.

          Greg Harris
           "Delight-directed study is child-responsive, but still parent-supervised. Delight-directed study strategies are more responsive to the interest of the student, without being indulgent. Rather than allow the student to study whatever he sees fit, however he sees fit, delight-directed study urges parents to guide their child’s studies and establish clear accountability for his work." Greg Harris

          For me it's about finding a balance between needing to have some structure but also feeding his current interest. It means taking the time to answer his questions and following the rabbit trail and learning via the scenic route. At the same time it's about not getting so far off the beaten track that we can never return. It's about making use of our environment and creating the science of relations that help my student to connect the dots and see that the whole world moves in concert and that there is not a single thing that happens in isolation.

          At times we are able to go straight away and answer the question at hand due to it's relevance at time of asking and at other times we might need to write it down in order to explore the topic at a more relevant time. For this we have created a book to jot down questions and have found that this relieves Sir N's pressing need to know now before we forget. If we do not have the book my smart phone serves as a note keeper.

          Delight Directed learning. . .
          • Means structuring learning around your child's interest and delight.
          • Flourishes in a flexible routine and is happy to take the scenic route in learning.
          • Means getting to know your child and what makes them come alive.
          • Starts with knowing what your child's particular learning style is and using this to encourage learning.
          • Starts with and fosters delight.
          • Is parent supervised and supported
          • Using a web approach to cover subjects rather than seeing individual subjects its taking one topic and covering a multiple of disciplines
          • Takes into account the interests and curiosities your child holds.
          • Is compatible with all home school methods and approaches.
          • Means using all your senses when learning. It entails cooking new foods, reading living books, exploring the library looking for books to find out more, building something, writing / sharing about your discovery.
          • Uses the environment (library, zoo, museum, field trips) to enhance and encourage learning via building relationships with the subject matter at hand.
          • Is not tied to an instructor guide to the exclusion of all other learning.

          Elsewhere on the web
          There are many who have shared their wisdom on the www here are a few articles to enrich your understanding of Delight Directed Learning.
          I have learned that as a home school mom I need to take note that "We are all inventors, each sailing out on a voyage of discovery, guided each by a private chart, of which there is no duplicate. The world is all gates, all opportunities." - Ralph Waldo Emerson.


          How do you apply Delight Directed learning in your home school ?

          Blessings
          Chareen

          This post is part of a week of blog hopping hosted by The Schoolhouse Review Crew: 5 Days of Teaching Creatively Day One

          5 Days of Teaching Creatively

          Day 2
          1. Delight Directed Instruction
          2. Schooling in the Kitchen
          3. Toy's, Games & Puzzles
          4. Homeschooling in a Crisis
          5. Hands on Projects
          Don't forget to enter the Teaching Creatively Giveaway.  Pop on over to Ben and Me to enter in order to win one of three prize packs. (1st prize $525 value, 2nd prize $225 value and 3rd prize $190 value)


          **Images from Free Digital Photo's:Magnifying glass Image  Courtesy of Stuart Miles Black Board Image courtesy of Nuttakit


          Here are some more posts by home school moms with ideas about Delight Directed Teaching

          Monday 25 February 2013

          Angry Bird Cake Tutorial


          This weekend was my Mom's birthday and she asked for an Angry Birds cake.  We chose Stella (Pink Bird) as our inspiration. My sister has been making Angry Birds cakes for a while and agreed to let me photograph and share the process with you.  It was not as hard as I had imagined and all you need is time and patience.

          Making the Angry Bird cake Beak and Tail 


          The process starts a week before (longer if you live in a humid climate) with the making of the beak and tail.
          • You need to use a powdered hardener (Cake Art Tylose Powder) in the fondant. Mix it in well before you add in the coloured powder. 
          • Use fondant to form a trapezoid shape out of yellow coloured fondant. Once you have your desired shape use a rolling pin to flatten/neaten all the sides.  Use a pair of kitchen scissors to snip 3/4 way down the beak.  Bend the beak open. We used two cooking essence bottles to support the beak until it was dry.  The completed beak is 2.5" (6.5cm) tall, a base of around 2" and a tip of about 1".  The base of the beak is square.
          • Use fondant and colour it black then form a tail (this is where all those years of playing with play dough come in handy!)  After two hours push a bamboo skewer into the tail and two into the beak.  Leave in a dry area to dry and harden.  Do not place in a sealed container as it will 'sweat' and not harden. It needs good air circulation to harden off.

          Making the Angry Bird cake body


          • We used an 8 inch (20cm) round cake tin. You will need enough round cakes that when stacked are about 8" high.  
          • Place two cakes bottom side together on the base, cut the mound off the top one then added the next cake and finally finish with the fourth. 
          • Leave the 'mound' in tact to form the crown of the head.  
          • Using a bread knife sculpt your cake to form the head of your Angry Bird.


          • Make some butter icing  the same colour as the cake you are making add in a little more milk to make it a runny consistency.  Use some of this icing or jam to glue your layers together.  
          • Place your sculpted cake on a cake board of your choice. Do a light coating of the mix over the outside of  the cake to seal the sculpted cake in preparation to ice. 
          • Make a thicker butter icing (YouTube).
          • We used a star tip and pink icing and started at the top of the cake and worked our way to the bottom in a circular pattern around the cake.  To make it easier to ice we placed the cake board onto a container on top of my Lazy Susan
          • We used a grass tip to ice the grass. (YouTube)


          Finishing Touches for the Angry Bird Cake


          • Fix the beak and tail onto the cake using the skewers. Using the pink icing ice around the edges to finish off.
          • Roll out white fondant icing and using a round wavy 2.5" circular cookie/scone cutter cut out two eyes and place on cake.  
          • Mix some black butter icing and using a thin round icing nozzle pipe in face detail. Pipe on the eye and eyelashes. 
          • Change to a thicker nozzle pipe on the eye brow.
          • For the hair we used a party table center piece which we purchased from the local grocery store in the party section. Using a pencil wrap the wire around to form curls. Remove from it's case and wrap the ends in clingfilm before tying on the ribbon.
          • We used two different types of 1" wide ribbon to make the bow. A light pink and a thicker white ribbon. These were layered one on top of the other and tied around the hair. This was then inserted in the top of the cake. Once in the cake the ribbon was cut to the desired length.
          • We used pre-purchased royal icing roses and placed these on the lawn around the cake.
          Completed product


          Enjoy the finished product.
          Blessings
          Chareen

          A little inspiration for you.  Here are three other Angry Birds Cakes my sister made last year.


          This post is part of The Schoolhouse Review Crew Blog Cruise : Recipe Share. Take some time and pop on over and be inspired.. and Try a New Recipe Tuesday.